
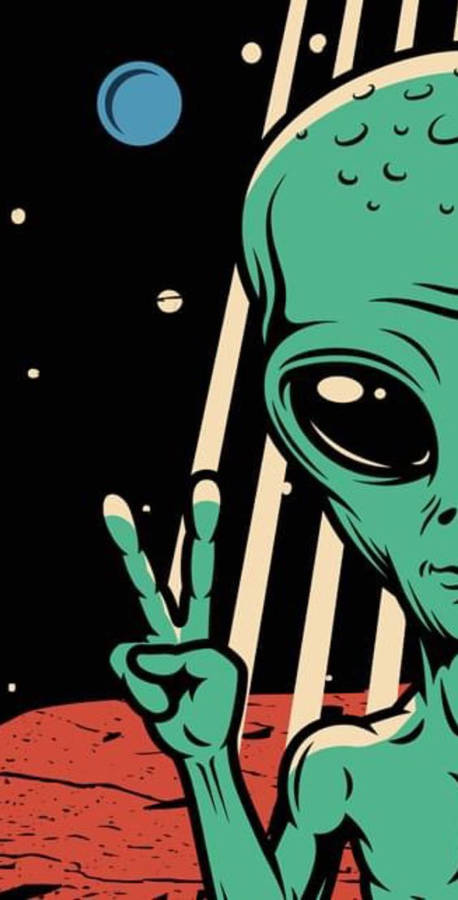
Quick question : Ever wondered where"Aliens" are from? That is, if they even are real...
Well, I can tell you this about the closest one I know. He`s From Zbrush, which is a Galaxy far far away. Join me into this interesting journey as we Explore how he went on to be alive in this mythical planet called "Maya".
Okay! Enough with the jokes.( Believe me, its not enough ;) ).
So a couple of weeks ago, I stumbled upon this very simple Reference image of an Alien, which you can check it out here. It looked simple enough, so I had it brought in Zbrush where I would sculpt it and turn it into a 3d Model (Hopefully). So the first thing I had to do was simply just load my reference image and by using the ZSphere tool, I was able to get a basic layout of how I wanted the model to appear.
 |
| 1. Layout of the Alien model. |
But since I can`t really do anything on the zspheres; using the "Adaptive skin" tool down the tool palette, I was able to have a preview of how the Alien`s base geometry would be like. Having my Adaptive skin resolution to somewhere between 4 and 5 (Depends on how crazy you are.) allowed me to select the amount of Polygons I wanted to start working with.
With the polycount in check, I scrolled back up and press "Make Polymesh 3D" that way I could now start to sculpt on to the base geometry. After what seemed like a lifetime, I was able to finish up the sculpt with all the primary features being the way I wanted them to be.
 |
| 2. Complete Sculpt. |
With the sculpting being complete, now came a rather more interesting part of the process, texturing. Since this is not a brick wall which I can easily download its textures and apply to a model, for this particular case it had to be custom painted. Luckily enough, Zbrush has another amazing tool called "Polypaint". Which is one hell of a timesaver, since it frees you from the sickening task of thinking about UVs all the time.
 |
| 3. Complete base polypaint. |
Now the main thing I want to point out just as a tip, is that, its good to add variations to your model`s paint. When I was doing the paint, I did put some variations by shading the highlights e.g the palms, chest, stomach & under the feet; and also the darker toned areas e.g knees, the knuckles, the armpits etc. This provided a good look onto the model as the colorization wasn't a single solid color with zero variations.
With the primary polypaint complete, to add even more variety, I used Alpha brushes to paint the borders between the highlights and darker areas; This gave me a much varietion in the color and texture of the Model. Having most of the texturing in place, again using the same alpha brushes, I started painting out skin details to the model. Giving it a sense of roughness, so it won`t appear all down smooth ( That would've been the smoothest skin in the World! ).
 |
| 4. Adding skin details. |
As you can see, the pretty small details add up into making the model look appealing to the eye. Now, don't go crazy with the detailing phase of the process as it may in turn seem " Too much" and you would just be wasting your time. Since I was happy with the work I did for the Alien, I generated UV maps using the "UV Master" available in Zbrush, I was able to generate the UVs for the model without a hustle. With the Model in still in HiRes, I extracted Normal and Diffuse maps, both at 2k resolution for use in other 3d Packages. At this stage, I decided it was time to wrap up my work in Zbrush.
 |
| 5. Final look of the Alien model. |
Last thing I did was Exporting the model as a FBX file for good use in the Autodesk packages ( Which are the one's I mainly use ).
Since I'm not writing a Book, this marks the end of our first Journey together. Hope you have enjoyed reading it and hopefully learned something new.
So until next time, My name is Yusuph Wickama, and thanks for taking your precious time to read this Article.
Since I'm not writing a Book, this marks the end of our first Journey together. Hope you have enjoyed reading it and hopefully learned something new.
So until next time, My name is Yusuph Wickama, and thanks for taking your precious time to read this Article.


Critique 1.
ReplyDeleteGreat work @Wicker man and very well organized and interesting to read presentation. As far as the Alien, you’ve discussed the use of reference which is great. It shows me that you have done your research which is an important element of design.
I liked the overall stylized character build short and friendly. Makes me thinks that the general audience for it are young kids. I loved the variation in textures with bumps feel. You have taken ownership by not designing exactly as your reference image it still came out interesting and fun to watch.
What I’d change to make it better:
1. Adding Glossiness to its skin texture to show some degree of slight wetness.
2. Try to use Lights on your renders images ( Since you use Zbrush get to know Keyshot ) or maya mental ray.
3. Render Wirefame images so that we can be able to see and tell you whether torpology flow is suitable for animation or not.
4. You also mentioned that you have done UV unwrap, but I haven’t seen images for that.
5. Last, I’d like to see the character rendered in a certain scene even, a basic un-textured floor with shadow to get a sense that its standing on the floor.
These are the things I expect to see on your repost of this project. Great work I know it has taken you good amount of time sculpting, keep up good work, nothing great comes easily. Otherwise there will be no need for someone like you.
great work man, loved the character description and the 3D model was simply priceless...well done
ReplyDeleteSure thing eric branco.....
ReplyDeleteTho i think and advice it wud be in a seperate article...maana comment ni ndefu kuliko article yenyewe,...hahah anywayz that was just a humour,,
other wise great thing Wicker wud love to get part two of this
Wicker i respect you and what you do. Man you're an inspiration.
ReplyDeleteLove your works kichiz
Man, xtremely sorry for the late reply, But I very much appreciate your appreciation. We`ve come far me and u basing on communities, and I wouldn't want that gone. Thanks mUch
DeleteWicker i respect you and what you do. Man you're an inspiration.
ReplyDeleteLove your works kichiz